A. Set Up Classroom #
All subject and main classrooms will be created by the IT Department for you the first time. Once you log in to your Google account and open the Google Classroom homepage, you will see all the classes you teach. (Alternatively, you may receive an invitation from your Academic Director if they are the class owner.)
However, there are a few important initial settings you must review and adjust for each class at the start of every semester.
1. Generate Meet Link #
- For each classroom where you want to enable Google Meet, you must generate a Meet link.
- This creates a permanent link attached to the specific class so that students can join if an online class occurs.

Note: You only need to do this for classrooms where Meet will be used. Other subjects can remain without a Meet link.
2. Make the Meet Link Visible to Students #
- Ensure the option “Visible to students” is checked.
- This allows students to access the Meet link when available.
- Don’t worry—students cannot join before you start the meeting.

3. Hide Class Code #
- To prevent unauthorized students from joining, always hide the class code.
- All students are already enrolled by the IT Department.

4. Do Not Change the Classroom Name or Section #
- Do not change the classroom name or section.
- This ensures proper monitoring and maintains the school’s unified naming format.
- Even small changes can negatively affect the monitoring process.
- You may customize the header photo or background.
5. Control Student Posts and Comments in the Stream #
- It is not recommended to allow students to post new announcements.
- Go to Settings → Stream → Stream Settings and select:
- “Students can only comment.”
- This ensures that only teachers can post, while students can comment under those posts.


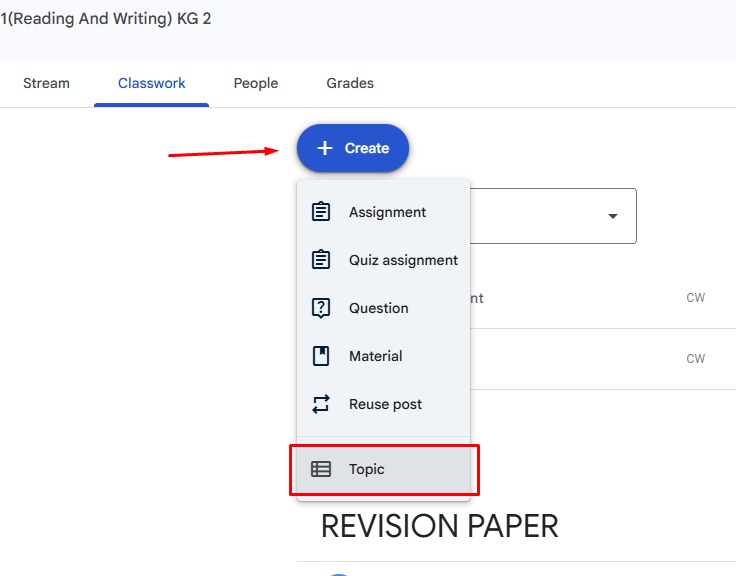
6. Create Class Topics #
- Topics help organize posts and content in the Classwork tab.
- You can drag and drop materials into the appropriate topics.
- It is highly recommended to organize materials into topics such as:
- Weeks (e.g., Week 1, Week 2, etc.)
- Units or Chapters
- Grade Categories (e.g., Quizzes = QZ, Homework = HW, etc.)
- You can filter the contents by the topics that you have created.
(Topic naming should follow the instructions of your Academic Director.)
B. Grading Settings #
If the Academic Director requires the Google Classroom grading system to be used, apply the following settings for each classroom:
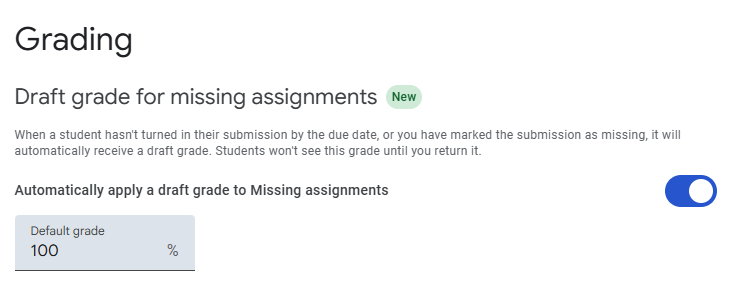
1. Set Draft Grade for Missing Assignments #
- When a student does not submit an assignment by the due date (especially if homework submission/checking is paper-based) or if you mark it as Missing, it will receive a draft grade.
- Students will not see this grade until you return it.
- To configure:
- Go to Class Settings → Grading Section
- Set the default grade to either 0 or 100:
- 0 → All students get 0 by default, and you must enter grades individually.
- 100 → All students get full marks by default, and you deduct marks where needed.
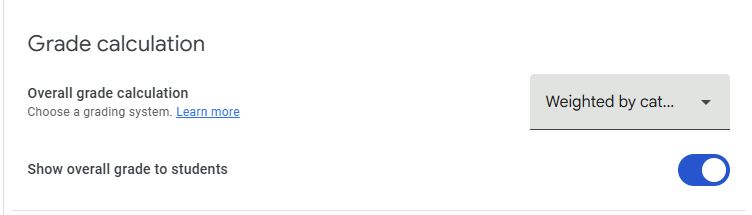
2. Overall Grade Calculation #
- Set the grading system to “Weighted by Category”, which is the method used in our schools.
3. Show Overall Grade to Students #
- Enable this option to let students see their overall grade.
- You may later disable it if instructed by the administration.
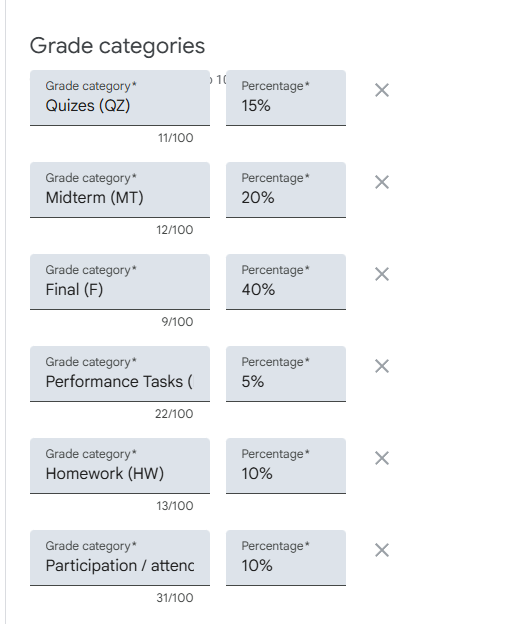
4. Add Grade Categories #
- Since we are using Weighted by Category, you must enter the grading categories (e.g., Homework, Quizzes, Exams).
- Ensure that the total percentages equal 100%.
- Enter each category one by one, following the naming conventions provided by your Academic Director.
5. Save Settings #
- After making all changes, ensure you click Save to apply the settings from the top button.
✅ Now your classroom is ready for proper use during the semester.


