First: Preparing the Daily Schedule
The academic director prepares a simplified schedule for the online learning day as follows:
-
Removing break periods.
-
Excluding Physical Education, Art, and any subjects that do not require live explanation.
-
Keeping only the core academic periods.
After the schedule is finalized:
-
The schedule is shared with teachers through WhatsApp groups or the official communication channels.
-
The schedule is then published to students through class channels and the officially approved platforms for each stage.
NOTE: Important Notice:
Teachers must not use any external links or alternative platforms based on personal preference. Only the steps and links provided here should be followed. This is essential to ensure a smooth experience for students, simplify access, and maintain a unified process across the entire school.
Second: Preparing Lessons on Google Classroom & Google Meet
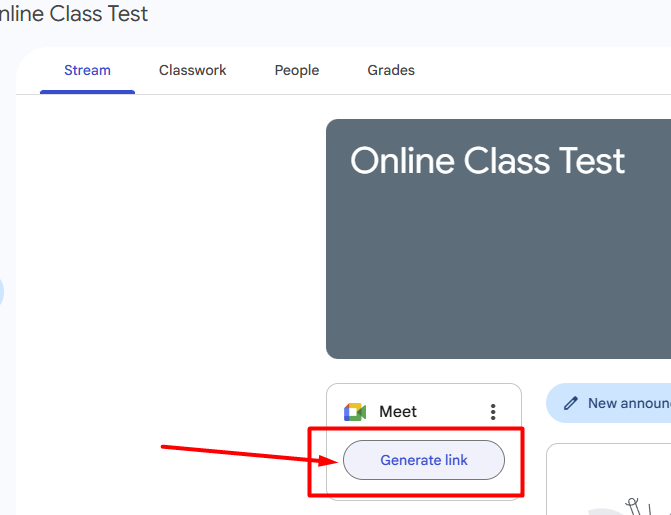
1. Creating a Permanent Google Meet Link for Each Subject
a. The teacher enters each subject on Google Classroom.
b. From the main tab, the teacher selects Generate Meet Link to create the Meet link for the first time.
c. This link will remain permanent for the subject and will be used for lessons whenever online learning is activated.
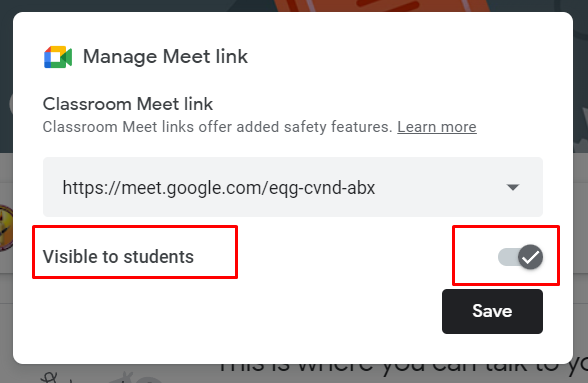
2. Making the Meet Link Visible to Students
-
Ensure that the Visible to students option is enabled.
Note:
-
Students cannot join the meeting before the teacher, even if the link is visible to them.
-
If a student needs to enter outside class time, they must be instructed to join only through Classroom.
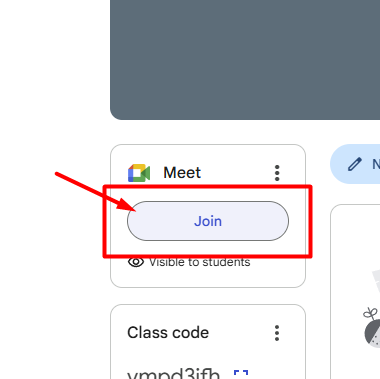
Third: Before the Lesson Starts
-
Five minutes before the class time, the teacher should enter Classroom, go to the subject according to the schedule, and click Join to open Google Meet.
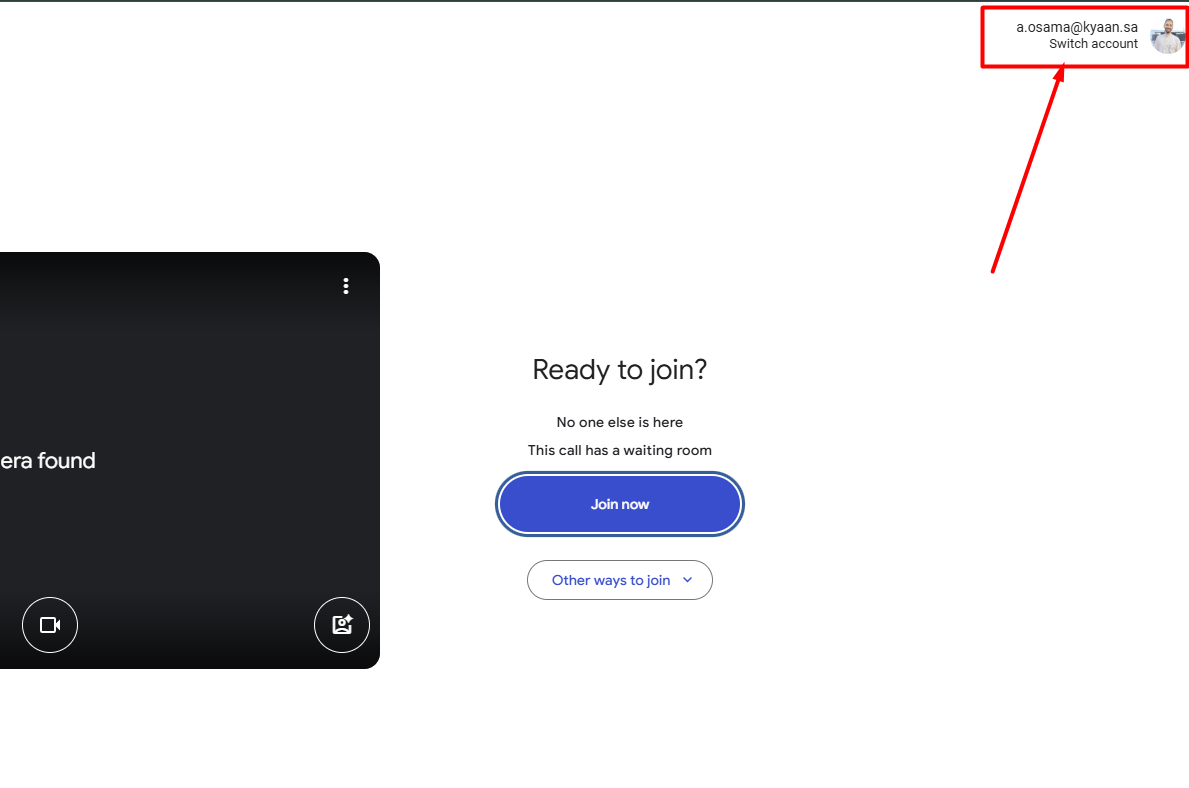
When Meet opens in the new tab, the teacher must ensure:
-
The account being used is the official school account and not a personal one (very important).
After clicking Join, students will begin joining automatically:
-
If the teacher receives a request to admit a student, this means the student is trying to join using a personal account.
-
The teacher may temporarily accept the student on the first day, but the student must be instructed to join only with their school account through Classroom to avoid requiring teacher approval.
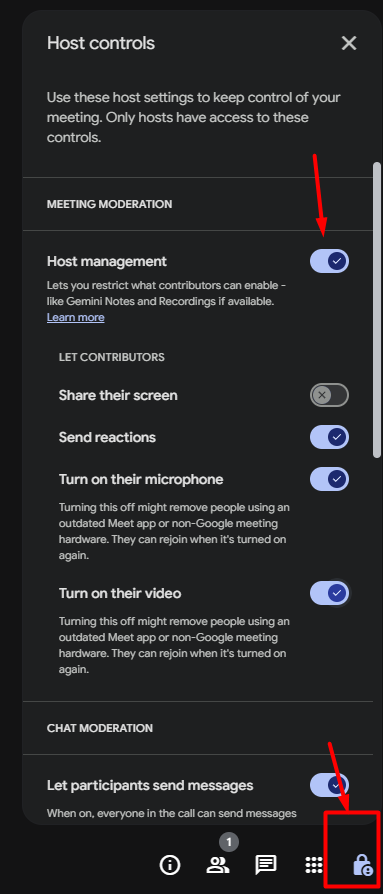
Fourth: Managing the Lesson
The Host Controls settings are automatically enabled for the teacher and include:
-
Controlling student microphone and camera.
-
Preventing screen sharing unless permitted by the teacher.
-
Managing the chat.
These settings can be accessed from the side menu under Host Management to ensure they are activated.
Fifth: Ending the Class
-
When the lesson is finished, the teacher must click End call for everyone, not just leave the meeting.
This ensures:
-
All students are disconnected immediately.
-
No student remains in the meeting after the teacher leaves.
Wishing you all success and productivity.